Welcome to Amiga Vampire Accelerators
Home Order Vampire V2 Accelerator FAQ Topics
  Login/Create an Account    

Menu

Amiga600_FPGA.gif Vampire 1200 V2
· About
· Core updates
tree-L2.gif Peripherals
tree-T.gif Trapdoor
tree-T.gif IDE
tree-T.gif F-Panel
tree-T.gif Ethernet
tree-T.gif Expansion
tree-T.gif JTAG
tree-T.gif Video out
tree-L.gif MicroSD
· All News

Amiga600_FPGA.gif Vampire 600 V2
· About
· Core updates
tree-L2.gif Peripherals
tree-T.gif PLCC-68 socket
tree-T.gif JTAG
tree-T.gif Video out
tree-L.gif MicroSD
· All News

Amiga600_FPGA.gif Vampire 500 V2
· About
· Core updates
tree-L2.gif Peripherals
bar.gif DIL-64 socket
bar.gif IDE
bar.gif Ethernet
bar.gif JTAG
bar.gif Video out
tree-L.gif MicroSD
· All News

Amiga600_FPGA.gif Vampire 600 V1
tree-L2.gif About
tree-T.gif Schematics
tree-T.gif Core
tree-L.gif Soldering
· Terms of service
· Ordering
· Tecnical support
· Core upload
· Vampire 600 map
· All News

Amiga600_FPGA.gif Vampire 500 V1
· All News

Amiga600_FPGA.gif Amiga FPGA Accelerator
· Introduction
· Pictures
· Voltage Level Translation
· Sharing ideas
· Who helped?
· Contact info

Amiga_Ball.gif Amiga Talk Talk
· Amiga 1200 Coldfire
· Talk regarding A608
· Amiga PPC

icon_members.gif Amiga Repair
· Amiga 600 restoration
· Mouse repair
· Cold solder joint
· Amiga 600 repair
· Keyboard repair

favoritos.gif Amiga Tutorials
· Install WB from WinUAE
· Play HAM Video

som_themes.gif Amiga Testings
· Amiga 600 plays video
icon_community.gif Forum
nuke.gif Downloads
home.gif Web Hosting
som_downloads.gif Web links

Amiga Vampire Accelerators: Amiga Tutorials

Search on This Topic:   
[ Go to Home | Select a New Topic ]

Amiga Tutorials: Play HAM video on Amiga
Amiga Tutorials

In this tutorial I want to show you how to play HAM video on your Amiga computer. For better performance you will need some accelerator cards but basic MC68000 and just 1MB chip ram can be enough to play HAM video. There are lot of ways you can transfer created files to your Amiga but most important thing here is to create video file according to some standards. For better results and more FPS you will need more than 800KB/s data transfer between your hard disk or CF card to processor. Basic Amiga 600 and simple CF to IDE 2.5 inch adapter can go about 550KB/s and if you want to use PCMCIA to CF adapter speed is lower and about 430KB/s. So for better results on basic Amiga 600 use CF to IDE 2.5 inch adapter and any CF card will be fine. Video on this configuration will work but with some disadvantages or maybe with audio problems. But please understand that you can't use 24 FPS videos, instead lower them to 15 FPS or less depending on your configuration. Please use software I recommended because this software is tested and can do the job. And remember that anything of this couldn't be possible without work of Damage_X.

Any comments related to problems, suggestions and upgrades related to this tutorial you may post on FORUM. Thank you and wish you nice time with your Amiga :)


Hardware needed:
Windows based computer
Amiga with IDE or SCSI controller ie. Amiga 600, Amiga 1200 etc...
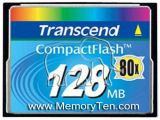
CF card
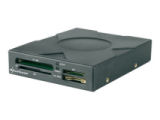
CF card reader
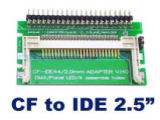
CF to IDE 2.5 inch adapter
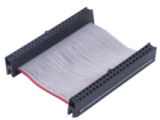
2.5 inch IDE cable


Software needed:
WinUAE DOWNLOAD
Total Video Converter DOWNLOAD
VirtualDub DOWNLOAD
Cool Edit Pro DOWNLOAD
AVI4HV package
DOWNLOAD


1. Video file preparation

For first stage of video file preparation we will use Total Video Converter. For testing purpose I found video on youtube and i download it in *.flv format using Orbit Downloader software. Start Total Video Converter and click on New Task and then to Import Media Files. Select file and open it and new window will appear. In that window click on Video File then Avi and select Loseless RAW AVI. It is essential to convert any video format you have to Raw *.avi file. After that click on Convert Now and program will start converting your video file. After work is finished go to the location of saved file in *.avi format and move it working directory. With Total Video Converter you can do much more like change FPS or do Video Crop & Resize or change Aspect Ratio, and you can use this options to prevent creating large *.avi files, but lets use this software just for preparation for another software called VirtualDub because in VirtualDub we can do much more.


2. Modifications on Raw Avi file

Now you have Raw Avi file created, but as you can see that file is very large but don't worry about that. Start VirtualDub click FileOpen video file, browse to your video file location and import video. If you see any errors during importing file please ignore them. In next step we need to set color depth. To do that click on Video and select Color Depth.... In next window set Decompression format and Output format to compressor/display to 16 bit RGB (555) and click OK. Now we need to set frame rate, click on Video and select Frame Rate... and on next window Change frame rate. Remember that if you want anything higher than 15FPS you will need faster Amiga or Accelerator card. After that we need to resize our video file and maximum size we can use is 320 X 216. Again click on Video and select Filters.... On next window click Add and open resize filter. After filter is open check Absolute (pixels) and enter resolution you want. Please stay with recommended resolution. You may also try to to enhance motion perception by selecting Interlaced. After this you can back to main VirtualDub window. Now we need to extract audio from avi file. Click File, select Export and choose Raw audio..., and save Mp3 file. After that disable audio clicking on Audio and selecting No audio. Don't use option File -> Save Wav... because in most cases that file will need additional modifications. If you decided to go this way import wav file into Total Video Converter and just save it like regular Wav file. Remember that either way you need to disable audio on avi file before you can export it from VirtualDub. Now all modifications regarding avi file are done and you can save created file by clicking on File and selecting Save as AVI.... Move your Avi and Mp3 or Wav files to working directory.


3. Creating Wav file

Mp3 file you created from VirtualDub needs some modifications, and we need to convert that file to 8-bit mono or stereo Wav file but remember sample rate must be less than 29KHz. For this you can find some audio filters for VirtualDub but since I already extracted Mp3 file from VirtualDub I ll use Cool Edit Pro. Open program and import Mp3 file, go to the Edit and select Convert Sample Type and in next window select 22050Hz for Sample Rate, Chanels Mono or Stereo, and Resolution 8 bit, click OK. Your work regarding modifications of audio file is done, all we need now is to save file in Wav format. Select File and the select Save as.... In next window it is essential to select correct type of file you want to save so in Save as type section select Windows PCM (.*wav) and save file.


4. Creating HAM video file

First we need to convert an join our avi wav files to *.HV file. And for this purpose we will use program called AVI3HV.EXE who is suitable for DOS or AVI4HV.EXE for win32. Either way go to Command prompt by clicking Start and selecting Run. Type cmd and hit Enter. Go to your working directory and type AVI4HV filename.avi, replace filename with filename you created using VirtualDub. So in my situation will be AVI4HV Terminator2.avi. After you hit Enter AVI4HV will start checking informations regarding your Avi file, and if everything is fine enter Y and continue. Remember if you didn't generated valid Avi file or file that is not according to standards established in previous sections of this tutorial program will warn you and you will have go back to generate video file again. After that program will ask you to enter name of audio file you created with Cool Edit Pro. So in my case it should be Terminator2.wav. Program will check your audio file, and only thing left to do is to enter name of output filename. Don't forget extension, in this case it should be *.HV. You can also enable dithering. And now you have it new file in your working directory HAM VIEO FILE.


5. Transferring Ham video file to your Amiga

There are number of ways to transfer your file to Amiga and I ll show you just two of them. One way is to copy file to your FAT formatted CF card, and then use that card together with PCMCIA to CF adapter, but remember starting HAM video on Amiga like this can drive you to speed problems as I noticed an explained at the top section of this tutorial. Second way is better one and it will give you better performance. Idea is to use WinUAE to transfer your files to CF card with already installed Workbench on it. If you don't have Amiga Workbench installed on CF card follow this TUTORIAL. Insert your CF card with Amiga Workbench installation to CF reader and start WinUAE with -disableharddrivesafetycheck command. Assuming that your other parameters in WinUAE like Kickstart ROM are already set and there are no Floppy drives in use go to the Hard drives and click Add Hard Drive and new window will appear. In that window select your CF card connected to your CF card reader. As HD controller you can use IDE0 and it this doesn't work for you try to use UAE controller. Check read/write and click add hard drive and new drive will appear. Now we need to add our working directory so click on Add Directory or Archive... and Select Directory and uncheck Bootable or set Boot Priority to higher value than your CF card is set, click OK and then Start WinUAE. After Workbench is started create somewhere on CF card directory Video. Also you can notice our working directory with all files we used for HAM video preparation. As my working directory is called CF I ll enter that directory, and to see any files in it use right mouse click and go to the Window,then to Show and select All Files. After that there are two files you need to transfer. Most important file is HAMP.RUN and that's our HAM Video player, and second one is our HAM video file with +.HV extension, in my case Terminator2.HV. Just drag those two files into your Video folder. Please keep in mind that transfer of files can take some time depending of size of HAM video file and speed of your CF reader. After transfer is complete exit WinUAE and take your CF card and import in in CF to CF to IDE 2.5 inch adapter on your Amiga and start your system.


5. Play HAM video on your Amiga

Go to Amiga Shell and find location of your Video directory and type HAMP.RUN filename.HV in my case HAMP.RUN Terminator2.HV, hit Enter and video should start. Remember that you need to experiment with video preparation to determine what are the best options for your Amiga system. Thank you for reading...

Posted by majsta on Sunday, February 26 2012 @ 14:04:35 CET (31705 reads)
(Read More, Pictures, Files... | Amiga Tutorials | Score: 3)

Amiga Tutorials: Install Amiga Workbench on real Amiga using WinUAE
Amiga Tutorials

In this tutorial I want to show you how to install Amiga Workbench 2.1 on standard Amiga computer using WinUAE with some basic hardware and software. Please understand that you need lot of patience to finish this process but I provided more than 50 pictures for guidance and this should be enough to get you started. I can't provide you needed hardware and software so don't ask about that.

Any comments related to problems, suggestions and upgrades related to this tutorial you may post on FORUM. Thank you and wish you nice time with your Amiga :)


Hardware needed:
Windows based computer
Amiga with IDE controller ie. Amiga 600, Amiga 1200 etc...
CF card
CF card reader
CF to IDE 2.5 inch adapter
2.5 inch IDE cable


Software needed:
WinUAE DOWNLOAD
Workbench ADF files
Amiga Kickstart ROM image


1. Test CF card

Insert CF card to CF card reader and format it to FAT. Formatting CF card to FAT is not important here but in some cases you may find out that there are some problems with your CF card and it is better to make shore that your CF card is OK before you go to the next step.


2. Setting WinUAE startup

Start WinUAE with -disableharddrivesafetycheck command who gives possibility to enable read/write functions for hard disk or in this case CF card. To do that create shortcut of WinUAE left click on that icon and select properties and in Target section add -disableharddrivesafetycheck


3. Starting WinUAE, basic settings and starting Amiga Workbench

After that double click on that shortcut and start WINUAE. Please use settings that you have on your Amiga computer, don't use some accelerator cards that you dont't have or more memory because that can lead to some problems when you try to add that CF card to your Amiga computer. Changing settings can speed up installation but can drive you to the number of problems for example if you use Kickstart version that you don't have some of the programs you add later using WinUEA can add settings related to that Kickstart and when you back CF card to your Amiga it can lead to system failure. Examples of this we can see if we upgrade our CF Workbench 2.1 installation with Magic Workbench using WinUAE on Kickstart 3.1 that we don't have in our original Amiga system, or problems related to resolutions and number of colors. Or in the situations when you are using your CF Workbench installation on WinUAE with WHDLoad to test games so you can transfer them to your Amiga and then to find out that those games works in WinUAE but on Amiga they don't just because you selected settings in WinUAE that are not identical to your Amiga.

Starting system you may see this message but don't worry just click OK and WinUAE should start.


Go to the Quickstart and select Amiga configuration that you own. As I have "stock" Amiga 600 I ll select that. Then go to the CPU and FPU section to check that everything is fine. Also check Chipset and RAM settings.

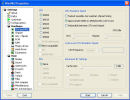
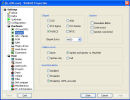
Then go back to the ROM section and add location of your Amiga Kickstart ROM image.
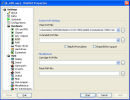


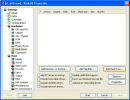
Go to the Hard drives and click Add Hard Drive and new window will appear. In that window select your CF card connected to your CF reader. As HD controller you can use IDE0 if you don't have some other devices connected because that could drive to conflicts and problems may appear when you are starting Workbench directly from HDF file or some Hard Disk or CF card. If this doesn't work for you try use UAE controller. Check read/write and click add hard drive and new drive will appear. You may also check Include removable drives and check Automount removable drives but in most of the cases this is not necessary. With checking last two options you will be able to see CF card from Workbench window even before is formatted to FFS or some other file system but sometimes this can drive WinUAE to crash.


Then go to the Floppy drives and check DF0: and add location of installation disk of Amiga Workbench, in my case wb21_install.adf also uncheck write-protected because sometimes installation will not work until you uncheck this option. You may also include other disks needed for Workbench installation so if you want to do that check other Floppy drives and add locations for disks like extras, fonts, locale... In my case those are wb21_extras.adf, wb21_fonts.adf, wb21_locale.adf. If you don't include other disk from the start you can add them later when Workbench installation ask from you to insert other disk needed for installation. In that case just press F12 and go to the Floppy drive section of WinUAE and then add location of needed disk, and click OK to back to the Workbench installation, wait for few seconds and installation of Workbench will continue.

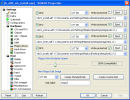

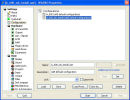
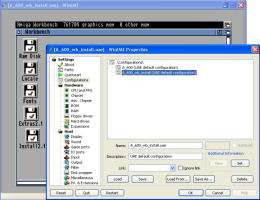
Now it's perfect time to save your configuration so you can use it later if you need to do some modifications or to repeat process of installation Workbench to some other CF card. Go to the Configurations and type name of your configuration and click Save.


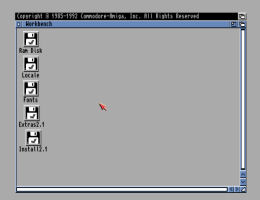
Click Start and there it is Amiga Workbench 2.1 started using WinUAE. Please remember if you have to back to the Windows from WinUAE click middle mouse button, and if you have to make some changes in WinUAE settings hit F12.


4. CF card preparation for installing Amiga Workbench

On Workbench window click on Install 2.1 and go to the HDtools section and start HDToolBox.


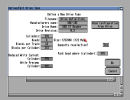
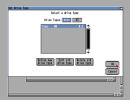
Select drive and click Change Drive Type, again select drive and click Define new drive type. On next window click Read Configuration From Drive. After that click continue and then your drive will be detected. You can change Manufacturer name and drive name or drive revision to something you want. Click OK and again on next window click OK and you can see that CF card is detected like is shown on the last picture of this section.


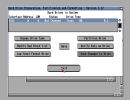
Click on Partition Drive, and then click to Advanced Options. In next window we can see that default setup created 2 partitions booth with 61MB named TDH0 and TDH1. You can also see that TDH0 partition is bootable with boot priority 0 and THD0 is not bootable so it can be used to store games, images and other files. If you don't like this setup you can just click Delete Partition and set partitions you like it but please remember that one of them must be bootable with boot priority 0. On that partition you will install Workbench. if you don't set it like this Workbench won't start. As I don't want two or more partitions since this CF card I m using is just 128MB I ll create just one THD0 bootable partition with boot priority 0. Click OK and click Save changes to Drive and check drive for errors clicking on Verify Data on Drive. After Drive is checked click Exit.


Sometimes you need to restart WinUAE to continue. Hit F12 and then restart WinUAE.


After WinUAE is restarted, and Workbench started again you can see that your CF card is detected and in most cases is already formatted and ready for usage. But just in case you need to format it click on icon that represent your CF card, in my case WB, left click select Icons and then select Format Disk and new window will appear. On new window add New Volume Name, check Fast File System and format the drive. Formating the drive may take some time depending on the size of your CF card. After finished we have formated FFS CF card, in my case, with 122MB of free space. Please remember that if you have more partitions or more CF cards first format one that will be used for Workbench installation, other ones you can format when you install Workbench. This way you can prevent your Workbench installation to be installed on some partition or drive you don't want.


5. Amiga Workbench installation

Close any open windows and double click on Install2.1, and then on Install 2.1 and select language of your Workbench installation. In new window Set Installation Mode and Proceed With Install. In next window Workbench installation will ask you where to install Workbench, and if you don't see any drives click Show Drives, select drive, in my case UDH0: WB: and click Proceed. In next window Workbench gives you some informations about installation. Click Yes to continue.

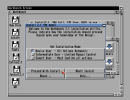

During installation you may get some messages to insert disks needed for Workbench installation. Those disk could be extras, fonts, locale or in my case Workbench disk because I didn add that one in any emulated Floppy units of WinUAE. To solve this I ll hit F12 and take back to WinUAE configuration select Floppy drive section and set location of my Workbench adf file in DF3: or any other WinUAE emulated floppy drive. After that back to the Workbench, wait for few seconds and click Proceed and if everything is OK installation will continue.

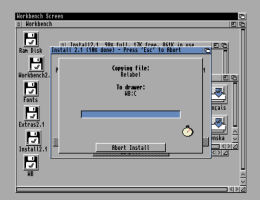

There are some basic settings and questions that your need to set up during Workbench installation regarding your printer and language you may want to use.

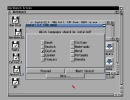

After some time Amiga Workbench is installed, click Proceed to finish installation.


Now it is time to test our installation from WinUAE. Hit F12 and restart WinUAE. Go to the Floppy drives configuration and uncheck all floppy drives and hit Start. If everything is OK Amiga Workbench should start right from your CF card.
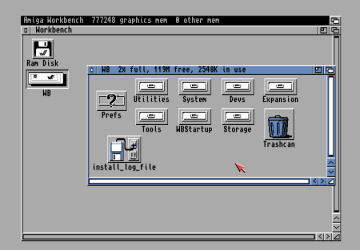


After Amiga Workbench is started you may want to save your installed workbench on your Hard Disk and use it as backup or testing system. Saving your installation is giving you opportunity to install programs or modifications and to test is before you want to use it on your Amiga. This way you may prevent some problems and if something goes wrong you can always start your installation again or copy it back to your CF card. To create backup system hit F12 and take back to configuration menu of WinUAE and go to the Hard drives section, double click your CF card and click Create hard disk image file. Please remember that extension of that image file is *.hdf. If you want to copy back your backup to CF card you need to make shore that Wokbench is started from *.hdf file. To do that click on Add Hardfile, add location of your image file, select Bootable and set Boot priority to 0. Remember that Boot priority of detected CF card must be higher than Boot priority of image file. After Workbench is started from image file format your CF card to FFS and copy all Workbench content to CF card. Remove your CF card from card reader and take it back to Amiga and system should start.


6. Starting Workbench on Amiga

There are only few steps to finish your work. Remove your CF card from card reader and insert it to CF to IDE 2.5 inch adapter, connect adapter to Amiga IDE controller using 2.5 inch IDE cable and that's it. Start up your Amiga and enjoy :)
Posted by majsta on Monday, February 20 2012 @ 16:13:41 CET (17507 reads)
(Read More, Pictures, Files... | Amiga Tutorials | Score: 2.93)

Survey
Are you interested in new production run of Vampire 1200 V2?

Yes, I would like to have one.
No, because I can't afford it now.
No, I am more interested in other accelerators.
Maybe but only if price/support is better.


Results
Polls

Votes: 63
Comments: 0

User panel
Welcome, Anonymous
Nickname
Password
(Register)
Membership:
Latest: CBM2018
New Today: 0
New Yesterday: 0
Overall: 76

People Online:
Visitors: 12
Members: 0
Total: 12

How to get Vampire card?
Express Interest Contact form

ALINEA COMPUTER SHOP

eBay store

AdSense_advert

Web site powered by PHP-Nuke

All logos and trademarks in this site are property of their respective owner. The comments are property of their posters, all the rest
You can syndicate our news using the file backend.php or ultramode.txt
Web site engine's code is Copyright © 2003 by PHP-Nuke. All Rights Reserved. PHP-Nuke is Free Software released under the GNU/GPL license.
Page Generation: 0.098 Seconds